4 Using the DTC root panel
The administrator interfacce is divided in 3 parts. We have already talked
about the general configuration. Let's talk about the 2 other parts: user management
and config file generation.
4.1 Generale description
4.1.1 How it works
DTC aims to generate config files for all supported daemons. All you
will do here will control the way those files will be generated.
A cron script is launched each 10 minutes validating the changes by wrinting
config files and reloading specified services.
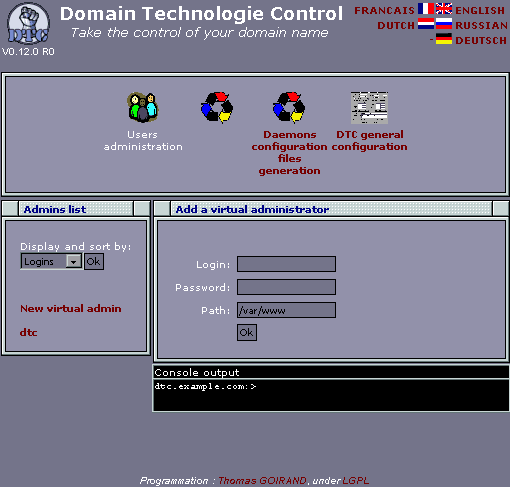
4.1.2 The web interface
DTC is splited in 3 main directories. The admin console (normally in
/usr/share/dtc/admin, but that may vary upon systems, like bsd likes to
find it in /usr/local/share...) is your main root web interface. This is
where you control all the domain hosted on your machine.
The "client" folder (normally in /usr/share/dtc/client) is for all your
virual administrator to enter their domain name configuration module.
You don't need it if you don't use the delegation of privilege
(virtual administrators), because all user modules are show on the root
console allso.
In standard distribution, dtc will install the root console to
http[s]://dtc.yourdomain-name.com/dtcadmin/, and a client panel to all
domain names under http[s]://dtc.yourdomain-name.com/dtc/. Don't bare to
customise the generation scripts under /usr/shared/dtc/admin/inc/gen_*.php,
add SSL, remove or add aliases, etc...
When all this will be setup, you will add a virtual administrator to your
computer. Then, you will add a domain name to that virtual administrator.
With the virtual administrator console (client console), it's possible
to enter all informations for mailbox and/or ftp accounts, and you can
create subdomains like "http://my.example.com" if "example.com"
was his domain name.
A good idear is to create "mx.your-domain-name.com" on your main domain
name, and to enter "mx.your-domain-name.com" as the default mx server for
the hosted domains (in the configuration panel). You can add an IP to that
subdomain, so it won't have an apache vhost associated.
You can then either call the php script files from the root console to
generate the config files, and relaunch the deamons (named, qmail-send,
and apache) manualy. You can of cource rely on the
/usr/share/dtc/admin/cron.php script, so everything is all automatic.
4.2 User management
4.1.1 Adding a virtual admin
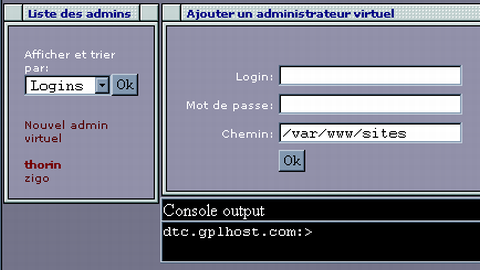
This form is for adding a virtual administrator (client), that will
be allowed to change properties of his domain(s).
The path tells where domain files will be stored (mail and http files).
Take care! The login will be happened to the path specified. So if you have
set /var/www/sites as the path, and that you add the user named foo, then
his path will be /var/www/sites/foo.
4.2.2 Managing you client domains
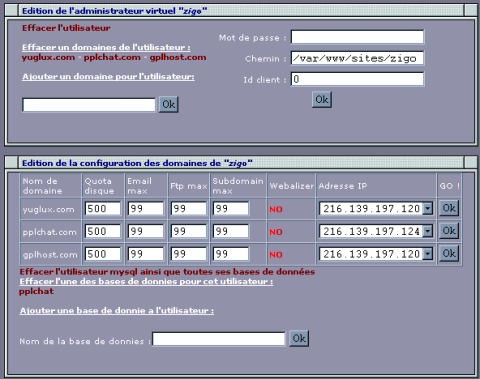
- Editing the virtual admin:
This form make you add and delete domains for a client and change his path. If you
change his path here, you have to move the files manualy.
- Configuration of each domains:
This form allow limitation to each domains (number of subzone, email account, or
ftp account...). The right most popup tells what will be the IP for apache vhosts
of this domain.
4.3 Generating daemon config files
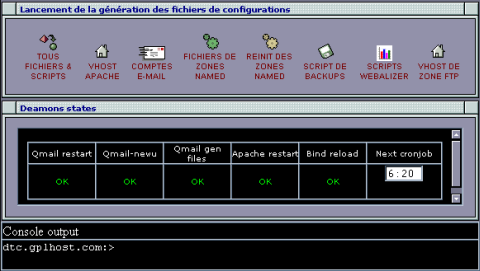
This pannel allow to generate config file for each daemon individualy. It helps when
debuggin a server and check that everythings work fine.